
The Ultimate Beginner’s Guide to Anno 117 Pax Romana
Read up on the core foundation of Anno.

Anno 117: Pax Romana is a complex city-building game. Apart from numerous mechanics you need to learn, you’ll also be dealing with a lot of math.
New players, especially those who are new to the franchise, might struggle and get overwhelmed, so here’s a complete beginner’s guide to help you get started in Anno 117: Pax Romana.
How to Grow Your Nation Properly

To grow your empire the right way, you must always keep track of income, health, happiness, and safety. You can think of these aspects as your core foundation. There are additional factors, such as knowledge, belief, and prestige, but the aforementioned aspects are more important to sustain because if they decline, your nation will face consequences.
Managing Income

Income is mostly generated through your people paying taxes. The higher your population, the higher your income. However, there’s a lot more to it than meets the eye.
Once you start building your first residences, you’ll find that they have certain needs. If you hover over their needs, you’ll find a tooltip that shows what they require and the attributes you get from satisfying the need. Most of these attributes are related to population, income, happiness, and other factors.
In short, you’ll also want to satisfy the needs of all residents to increase population as well as your income. This becomes a bit of a tug-of-war since to satisfy their needs, you must have the same people work on production buildings that contribute to expenses.
Population increase -> Gain more workforce -> Need to satisfy more needs -> Build production buildings to satisfy needs -> Gain more income through population growth and satisfying needs -> Also gain more expenses
This whole process loops around in an endless cycle, becoming more complicated as you advance through the residential tiers. However, the general rule is that you actually gain a lot more income as long as you are not overproducing your goods. Expenses, specifically from production buildings needed to satisfy needs, won’t exceed your income generation through your growing population.
So, how are you still sometimes lacking income? There could be three major reasons for it. First, you could have a big military army that incurs a lot of expenses. Since the ships and army units don’t contribute to income, they are just expenses.
Second, you could have too many public service buildings, city watches, and infrastructure. These buildings contribute to expenses, but they are generally useful.
Third, you have inefficient production setups. If you have buildings running at less than 50%, they are most likely eating up more money. Try to keep all production setups at 100% or close to it.
The main way to grow income is to lessen these expenses while growing your population to absurd levels, while satisfying all their needs perfectly.
Health, Happiness, and Fire Safety
I’d say these three needs go hand in hand with each other. These needs are satisfied by putting Vigiles, Custodia, and Medici, which are basically your fire station, police station, and hospital, respectively.
These are your city watch buildings, and you want them accessible to your whole population, including your production buildings. This is why space management is a key factor: you want to have enough space for your production while also considering the impact of these city watch buildings on each building.
If these are not enough to satisfy your island’s health, happiness, and fire safety numbers on the top panel, you must resort to other public service buildings. For example, a Sanctuary accessible to the residents will increase their happiness by +1 each. That’s a massive buff when placed correctly.
Knowledge, Belief, and Prestige

You can think of Knowledge, Belief, and Prestige as catalysts for significant growth. They have no consequences as they are just massive bonuses, depending on how you use them.
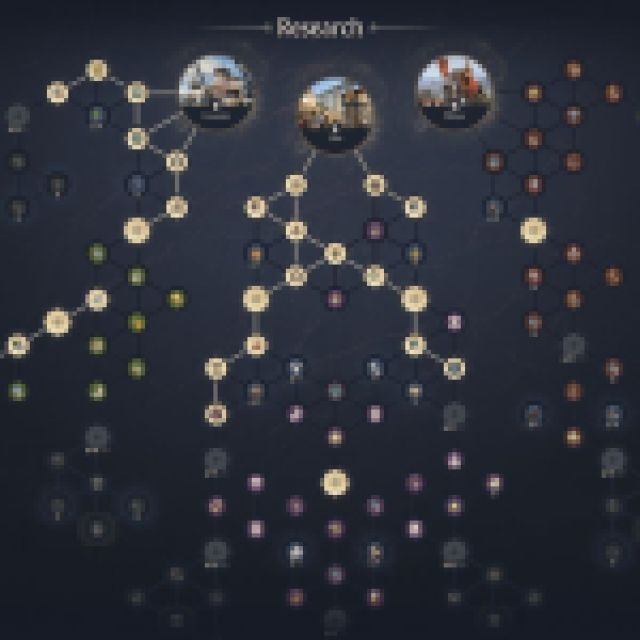
Knowledge contributes to the speed of your research, giving you significant upgrades, such as Paved Roads, production efficiency buffs, increased workforce, military buffs, public service improvements, and much more.
Increasing your knowledge gain is mostly from meeting the specific needs of residents, like an Eques (Equites). You can also gain more from specific public service buildings or even specialists.
As for Beliefs, you can think of them as more passive buffs gained from the chosen Gods your islands worship. This is up to you on which buffs you want, as the religion screen shows what type of produce each of these Gods increases or buffs.
Prestige is another aspect you can improve that unlocks more specialist slots for your main Governor Villa and Officia buildings. These buildings are like towers that provide a massive buff to their surroundings, depending on the specialists placed inside.
This is why you want to place your Governor Villa and Officias near other buildings and choose specialists that can provide massive bonuses to the surroundings. The more prestige you get, the more specialist slots and more Officia buildings you can place. You gain Prestige normally through progress, public service buildings, and meeting certain needs like Togas.
You’ll generate Knowledge, Belief, and Prestige over time, but even if you don’t focus on them, you won’t experience any consequences, unlike the four key aspects mentioned before.
Combat and Military Mechanics
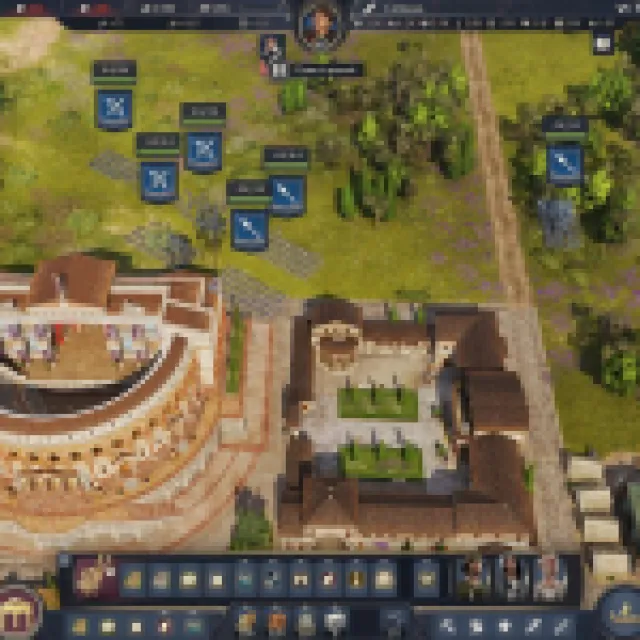
Anno 117: Pax Romana’s combat mechanics are simple and lenient. You have land units that can fight others on land and also have naval combat, where ships may attack other ships or buildings by the shore, such as trading posts.
However, the main goal of military or combat dominance is to suffocate another nation and force it to surrender or act as one of your specialists, surrendering all its possessions to you.
If you just want one of their islands, you can still take it by force. Each island would have a Governor Villa, and it is the center of prestige and defense of the island. When a Governor Villa is taken over, the island itself is also taken over.
For defenses, you always want to keep your Governor Villa heavily defended with units, garrisoned forces, and walls, as well as being positioned in the center of the island.
With those mechanics in place, you just have to find the perfect balance between maintaining a strong military presence while sustaining your people’s growth and the nation’s economy.
Trade, Diplomacy, and Alternating Provinces
As for the last features you need to know, we have trade, diplomacy, and alternating between the provinces (depending on your playthrough).
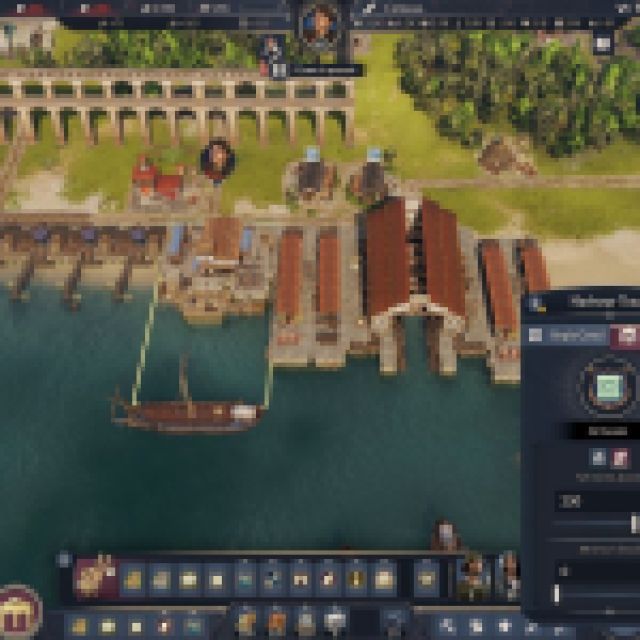
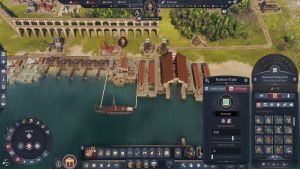
For trade, it is very simple. Each island has a trading post by the shore. Selecting an unowned island’s trading post will show goods that they are offering and goods they are willing to purchase. You can only see this if you have a trade treaty with the governor. However, you can always check for neutral NPCs like Diana and Valeria for these goods.
You can manually fulfill their requests or buy their offers by sending a ship with cargo slots.
If you want to trade passively, you can select your own trading post and select any of your resources to sell at a certain stock limit. The prices are fixed, so it is very easy to manage, as you just want to put them on sale here.
You can also establish trade routes by pressing the “Trade Route” button on the left-side panel. You can establish a new trade route by selecting two or more islands and adding a ship to the trade route.
For each island, you can load any resource per cargo slot, but you’ll need to set an unload order to any other island to keep the cargo slot empty for another pickup. Each cargo slot is tied to a specific resource, so when you have different types of resources in one ship, you’ll always have a consistent supply of them, even when there’s an overflow of supply from a specific resource.
For example, if you set the first two cargo slots to load Timber and the other two cargo slots to load Tiles, it’ll unload all of them when possible. If the island receiving the resources is full, the ship will hold the resources and continue ahead with its trade route. Let’s say it was Timber that was oversupplied, but the Tiles were all delivered. The ship will refrain from loading Timber again since those cargo slots are full, keeping the trading route alive.
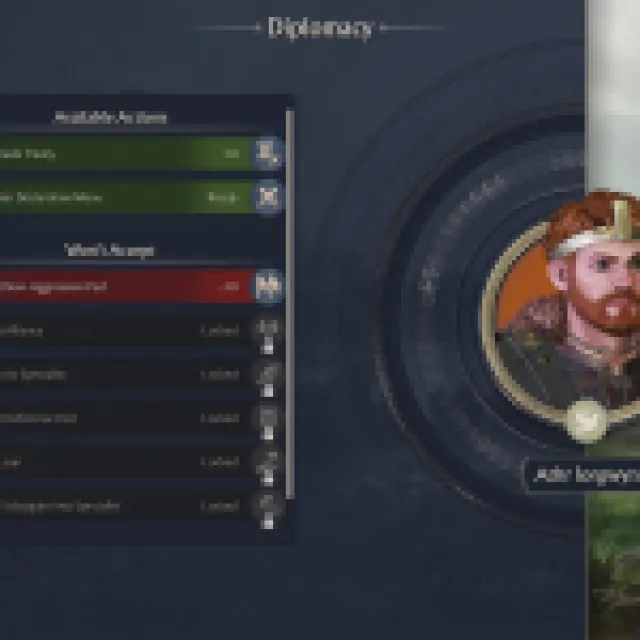

Diplomacy is very simple. You can open the diplomacy tab on the left panel and select a Governor or Raider. You have the option of sending them gifts to improve relations, sign a trade treaty, declare war, request an alliance, request defenses, take a loan, or subjugate them. Each action has some requirements, so this will develop throughout the playthrough.
All you have to know is that certain actions, such as real-time decision events in your nation, can lead to other Governors increasing or decreasing their reputation with you. When it gets too low, they’ll most likely declare war, even if you have a significant advantage in all aspects of the game.
For alternating provinces, you have the option of switching between Latium and Albion, as if you are playing two different playthroughs. Having a presence in both provinces is significant, as there are mechanics where you must establish trade routes between two islands you own from different provinces to meet certain needs.
If you’d like to see more helpful guides, news, or features from Prima Games, please consider adding us to your preferred sources.